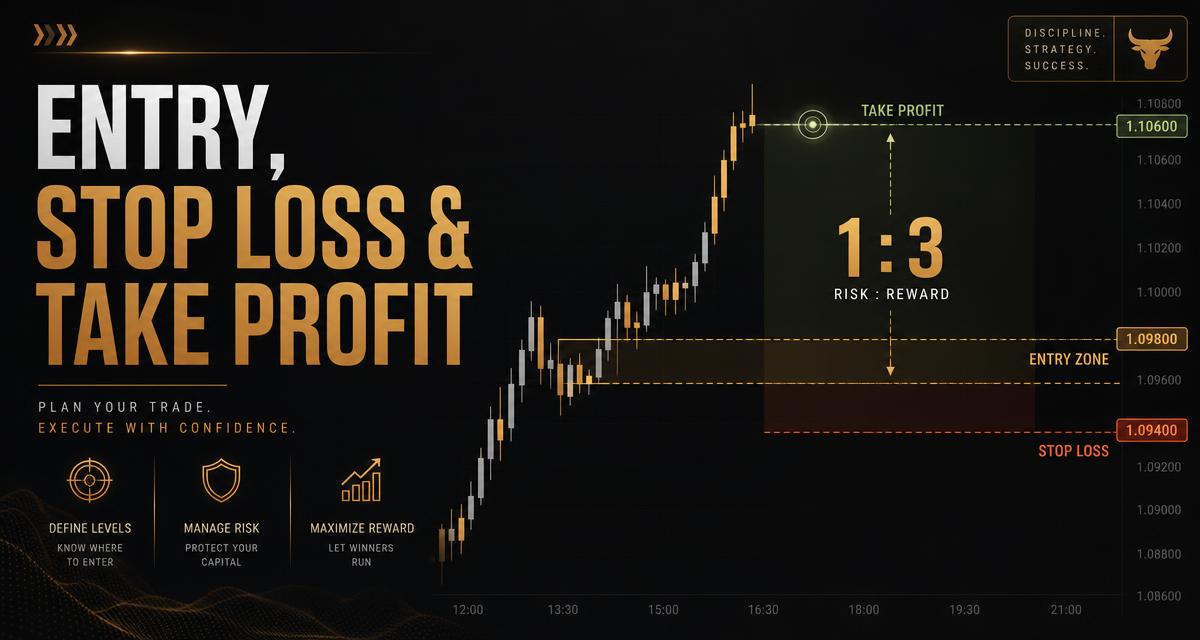
Why the three levels matter more than the entry
Beginners obsess over entry. Professionals obsess over the distance between entry and stop, because that number is the only part of a trade you fully control. Decide the stop first and the position size follows; decide the size first and you are gambling.
Step 1 — find the entry zone
An entry zone is a band, not a single price. Draw it where the chart has already shown it cares: the top of a prior consolidation that is now support, the midpoint of an unfilled imbalance, or the base of the candle that broke structure. Buying inside a zone gives you two or three chances to get filled instead of chasing one tick.
Step 2 — place the stop below real structure
- Longs: below the swing low that created the move, plus a buffer for the average wick size on that timeframe.
- Shorts: above the swing high, same buffer logic.
- Never place the stop at a round number or exactly on the obvious low — that is where liquidity is hunted.
- If a structurally correct stop is too wide for your account, the trade is too big, not the stop.
Step 3 — set targets from risk/reward, then sanity-check them
Risk is entry minus stop. Reward is target minus entry. A 1:2 setup means the target is twice the risk distance; 1:3 means three times. The maths is trivial — the discipline is refusing setups that do not clear your minimum.
The sanity check matters just as much: a 1:3 target that sits directly under a heavy resistance band is not a 1:3 trade, it is a 1:1 trade with wishful thinking attached. Put TP1 in front of the nearest obstacle and TP2 beyond it.
A worked example
Entry zone 100.00–100.50. Swing low at 98.20, so the stop goes at 97.90 (buffer included). Risk from the midpoint entry of 100.25 is 2.35. TP1 at 1:2 is 104.95; TP2 at 1:3 is 107.30. If the daily resistance is at 104.20, move TP1 to 103.90 and accept 1:1.5 on the first scale-out while TP2 stays in play.
Win rate and expectancy
At 1:3, you can be wrong twice for every win and still finish ahead. At 1:1 you need better than 50% just to break even after fees. This is why the ratio, not the hit rate, is the number worth optimising — and why cutting a winner early to “lock something in” quietly destroys the edge.
Letting the model do the arithmetic
Trade Eyes returns all three levels from a single chart screenshot: an entry zone anchored to structure, a stop below the relevant swing, and two targets with the resulting risk/reward already computed. For a beginner that removes the two most common errors — an arbitrary stop and a target picked because the number looked nice. Treat the output as a starting hypothesis, then apply your own position sizing.
Skip the manual arithmetic
Upload a chart and get an entry zone, stop, and two targets with risk/reward already calculated.
Frequently asked questions
What is a good risk-reward ratio for trading?
1:2 is a sensible floor and 1:3 is a strong setup. Below 1:1.5 the maths rarely survives fees and a realistic win rate.
Where should a stop loss go?
Below the swing low that created the move for longs (above the swing high for shorts), with a buffer sized to the timeframe's typical wick — never exactly on the obvious level.
How do I pick a take profit target?
Project the risk distance two or three times from entry, then move the target in front of the nearest real resistance or support if one blocks the path.
Can Trade Eyes calculate these levels for me?
Yes. It returns an entry zone, stop, TP1 and TP2 with the resulting risk/reward from a single chart screenshot.